Getting Started with AI Workspace: Complete Beginner's Guide

AI Workspace transforms how you work with ChatGPT and Claude.ai by giving you a professional workspace to organize prompts, manage conversations, and boost your productivity. In this tutorial, we'll walk through the basics of getting started.
📚 What You'll Learn
- ✓ How to access AI Workspace
- ✓ Understanding the interface
- ✓ Creating your first workspace
- ✓ Linking and organizing chats
Step 1: Accessing AI Workspace
After installing the extension from the Chrome Web Store:
Navigate to ChatGPT or Claude.ai
- • Open chatgpt.com or claude.ai in your browser
- • You'll notice a new floating button appears in the bottom-right corner
- • This is your AI Workspace quick access menu
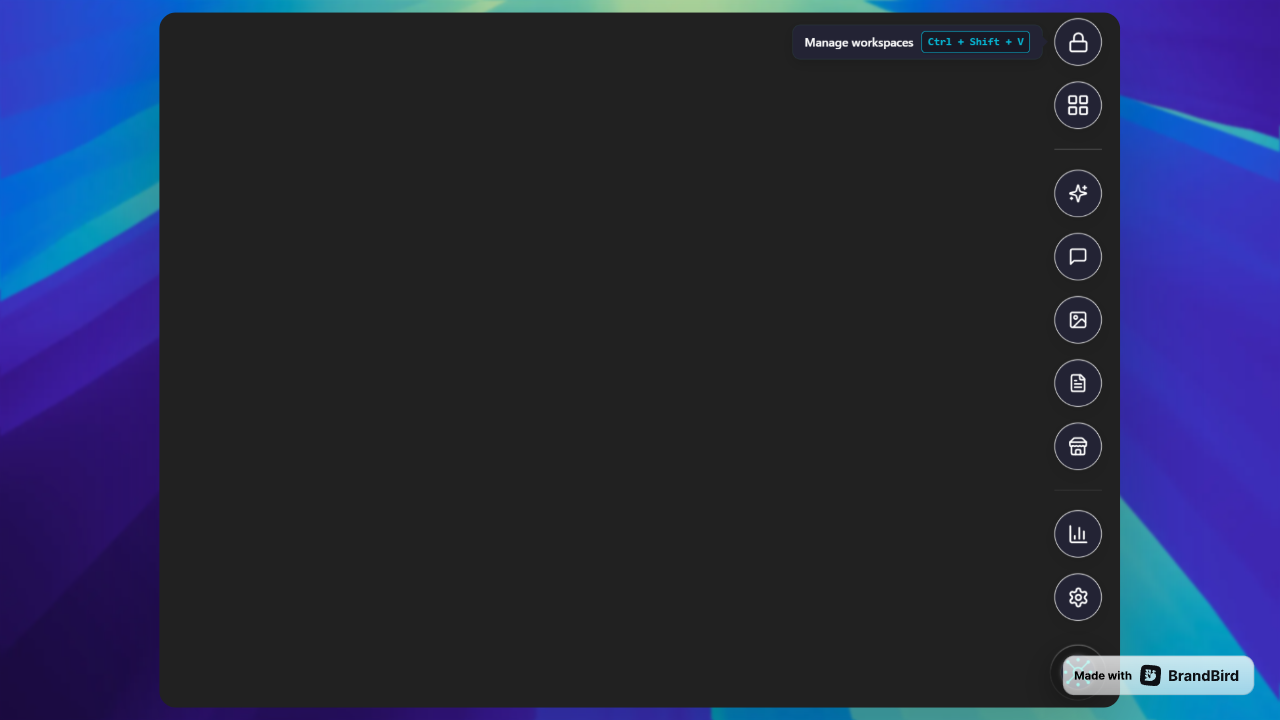
The circular button with the AI Workspace icon is always accessible. Click it to reveal your workspace options.
Step 2: Understanding the Interface
When you click the floating menu, you'll see several options:
Your prompt library and management
Conversation history and organization
Your AI-generated images
Quick notes and documentation
Switch between environments
Customize your experience
The Workspace Concept
Think of workspaces like different projects or contexts. Each workspace keeps its prompts, chats, and notes completely separate:
For your individual projects
For professional tasks
For educational content
For customer-specific projects
Step 3: Creating Your First Workspace
Let's create a workspace for a specific project:
Open the Workspace Selector
- • Click the floating menu button
- • Select "Manage workspaces" from the menu
- • You'll see your current workspace (usually "My Workspace" by default)
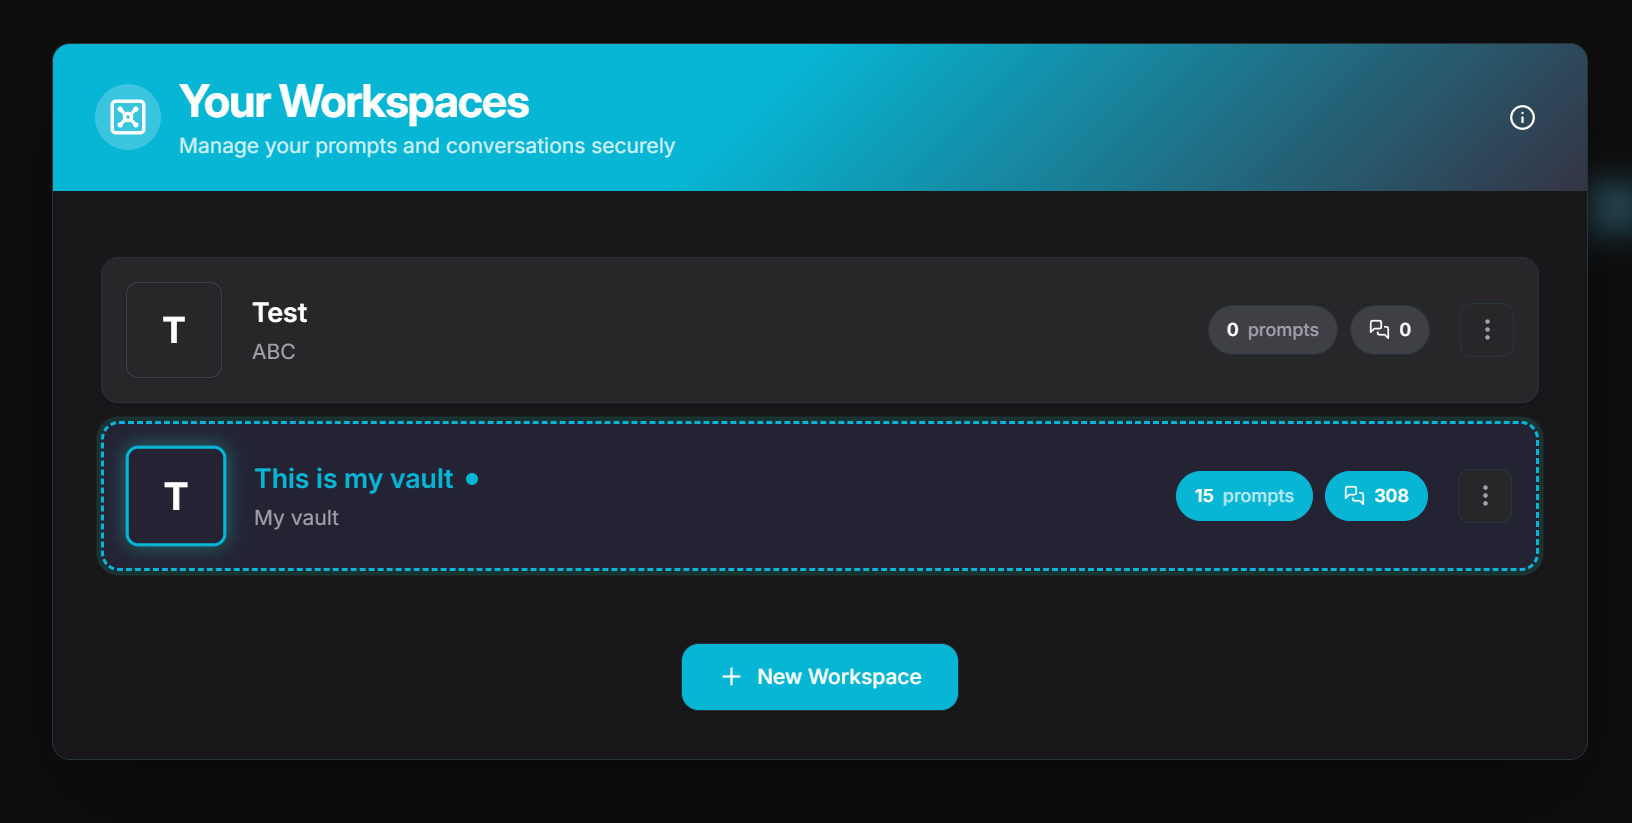
Create a New Workspace
- • Click the "+ New Workspace" button
- • A dialog appears asking for workspace details
Name Your Workspace
- • Enter a descriptive name (e.g., "Blog Writing Project")
- • Add an optional description
- • Pick a color for easy visual identification
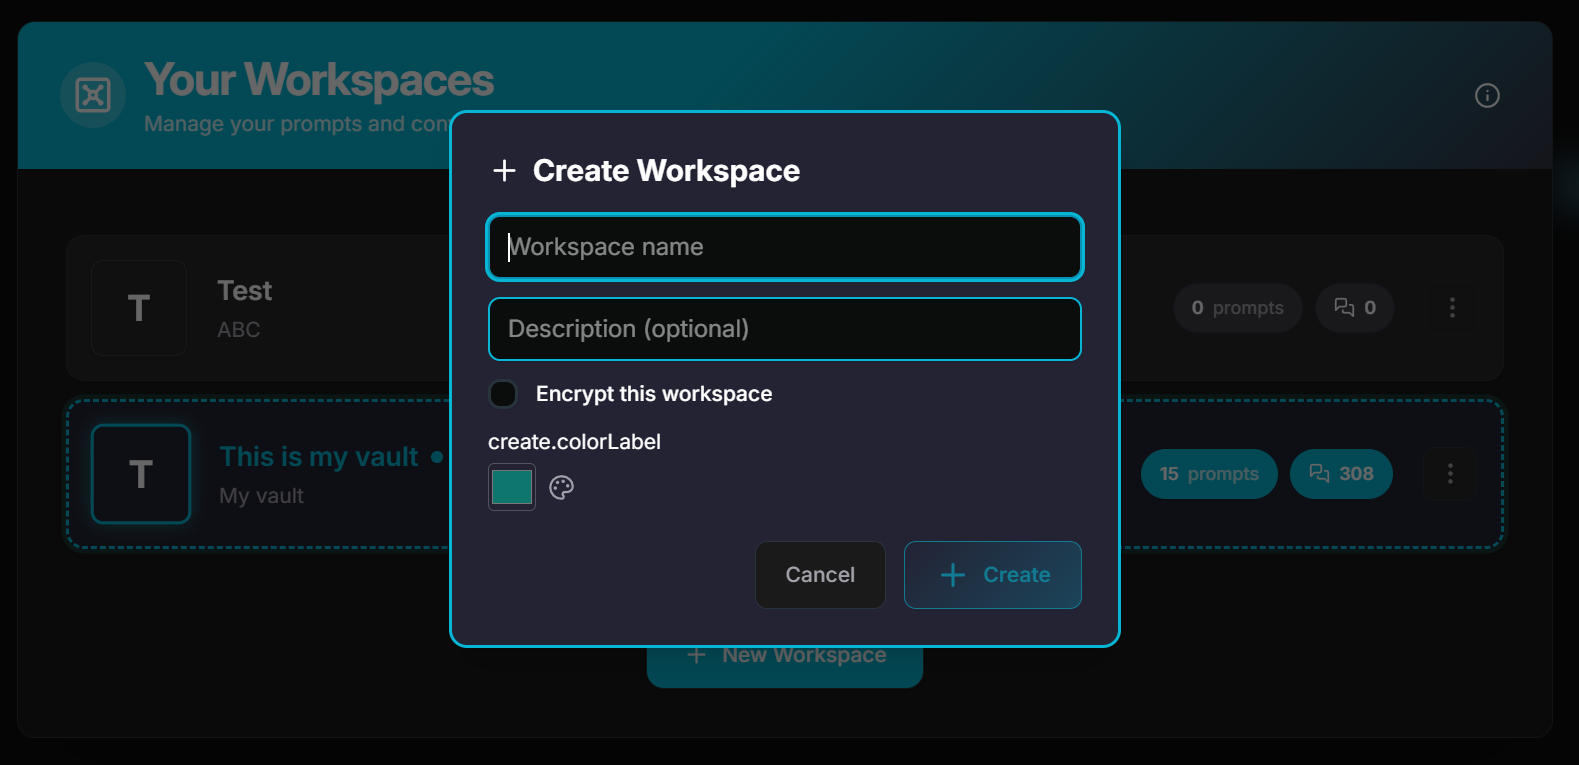
🔒 Security Option: Encrypt Your Workspace PRO
For sensitive projects, enable encryption:
- • All prompts are encrypted locally on your device
- • Password required to access the workspace
- • Auto-locks after 15 minutes of inactivity
- • 100% local encryption — never sent to any server
⚠️ Important: Choose a strong, memorable password. There's no password recovery option!
Step 4: Basic Navigation
Switching Between Workspaces
Click the workspace manager at the top of the floating menu. Click any workspace to switch instantly. Each workspace maintains its own:
- Prompt library
- Chat history
- Notes collection
- Categories and organization
Linking Chats to Workspaces
One of the most powerful features is organizing your conversations by linking chats to specific workspaces. This keeps your project conversations separate and organized.
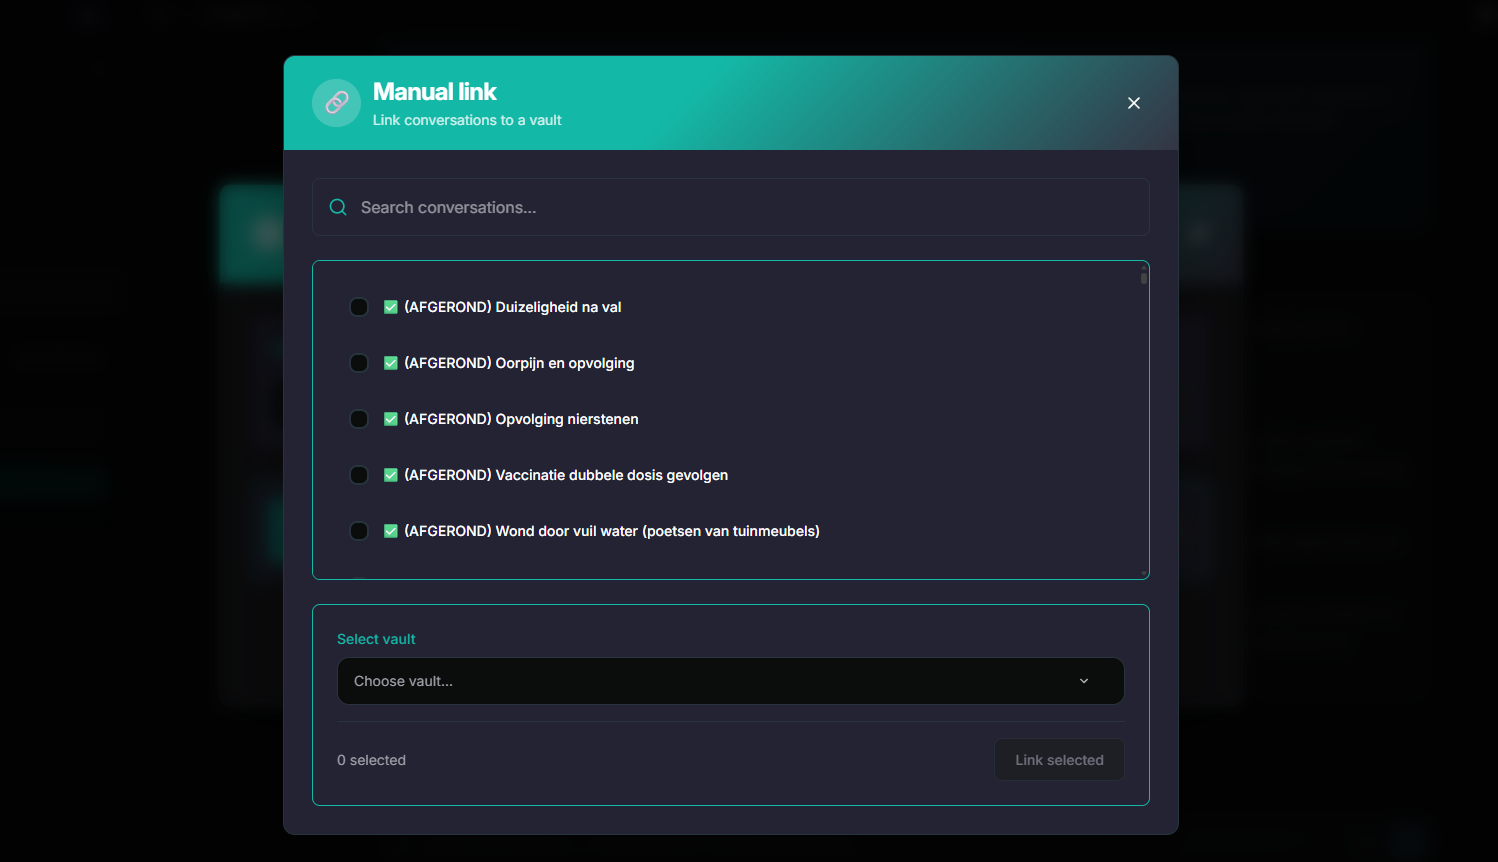
Manual Chat Linking
Perfect when you want precise control. Review each new chat after syncing and assign it to the appropriate workspace individually.
Bulk Linking
Use "Link All to Workspace" to quickly assign all new chats to the same workspace. Great after focused work sessions.
Automatic Assignment
Enable in Settings to automatically link new chats to your active workspace. No manual intervention needed!
💡 Pro Tip: Before starting a new project, create and switch to the dedicated workspace. Then enable auto-assign in settings. All conversations during that session will automatically organize themselves!
Deleting a Workspace
When you no longer need a workspace:
- Open Workspace Management and find the workspace to delete
- Click the trash icon — a confirmation dialog shows what will be deleted
- Choose to unlink chats (preserve them) or delete chats (permanent)
- Confirm deletion
⚠️ Important Warnings
- • Workspace deletion is permanent and irreversible
- • Encrypted workspaces cannot be recovered
- • Always export important prompts before deleting
- • Consider unlinking chats to preserve conversation history
What's Next?
Now that you understand the basics, you're ready to:
- → Create and organize prompts
- → Use variables for dynamic prompts
- → Organize with categories
- → Customize your workspace settings
Tips for Success
Common Questions
Can I use multiple workspaces at the same time?
You can only have one workspace active at a time, but switching is instant and you can quickly jump between them.
Is my data synced across devices?
With a PRO account, your workspaces can be synced across all your devices.
Can I share workspaces with team members?
Currently, workspaces are personal. Team features are planned for future releases.
What happens if I delete a workspace?
All prompts, chats, and notes within that workspace are permanently deleted. Always export important data first.
Conclusion
You've now mastered the basics of AI Workspace! The floating menu is your command center, workspaces keep your projects organized, and the interface is designed to stay out of your way while providing powerful features when you need them.
In the next tutorial, we'll dive into creating your first prompt and see how AI Workspace can dramatically speed up your workflow.
Ready to upgrade your workflow?
Join thousands of power users who trust AI Workspace to organize their prompts and conversations securely.
Install for Free